BloodHound: Visualizing the Attack Path
1. Installation and Setup (Windows/Neo4j)
BloodHound requires a Neo4j database to store and query the data. The following steps detail the typical setup procedure on a Windows attacker machine.
Phase A: Neo4j Service Setup (Command Line)
Ensure you have the Java Runtime Environment (JRE) version 17 or higher installed. Download the Neo4j Server zip file and extract it.
Download Links:
Neo4j Server (compatible with JRE 17+): Neo4j Download Center
-
Install Neo4j as a Windows Service
Open an elevated PowerShell terminal inside the extracted Neo4j
binfolder and execute the installation command:cd .\neo4j-community-2025.10.1\bin\.\neo4j.bat windows-service installNeo4j service installed.
-
Start the Service (If Access Denied , Open Powershell as Administrator)
Start the newly installed service:
net start neo4jThe Neo4j Graph Database - neo4j service is starting.. The Neo4j Graph Database - neo4j service was started successfully.
if there is problem then use :
C:\AD\Tools\neo4j-community-4.4.5-windows\neo4j-community4.4.5\bin> neo4j.bat install-service
Neo4j service installed
C:\AD\Tools\neo4j-community-4.4.5-windows\neo4j-community4.4.5\bin> neo4j.bat start
Phase B: GUI and Client Setup
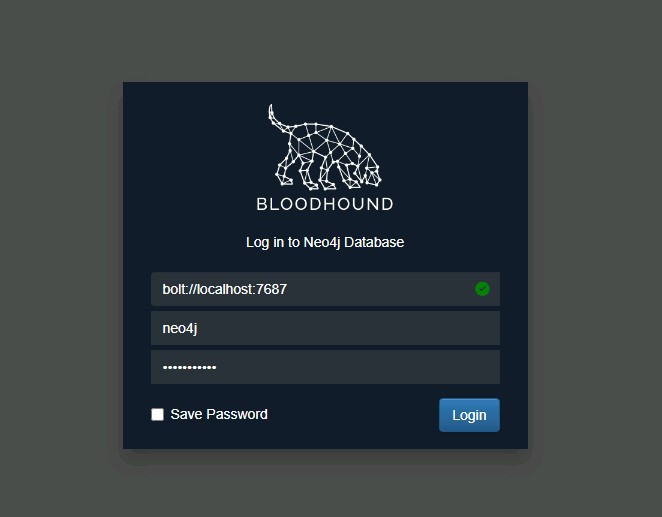
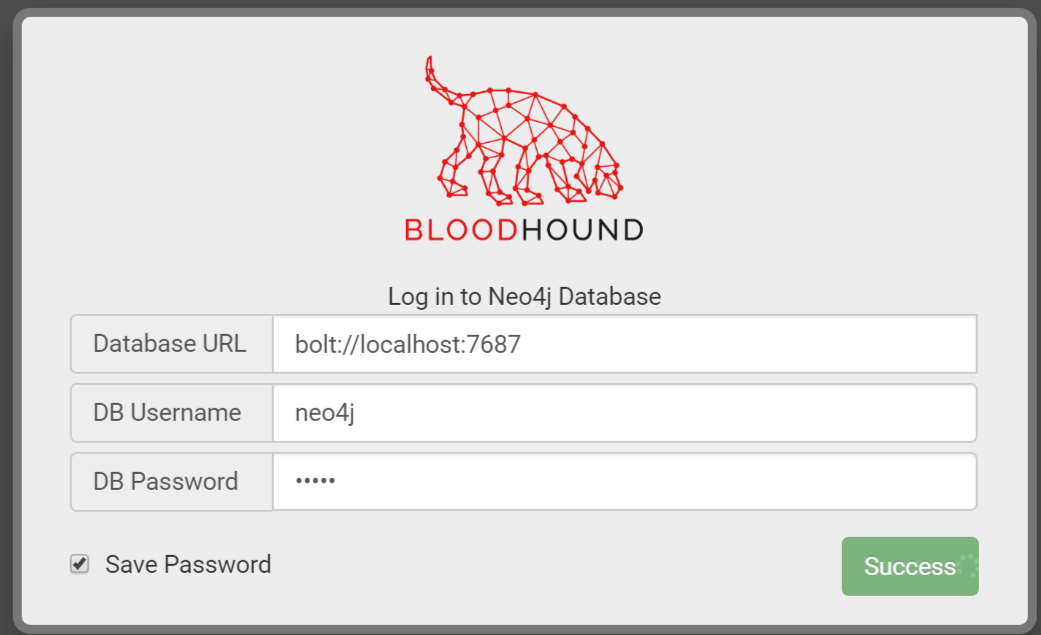
Initial Neo4j Browser Login
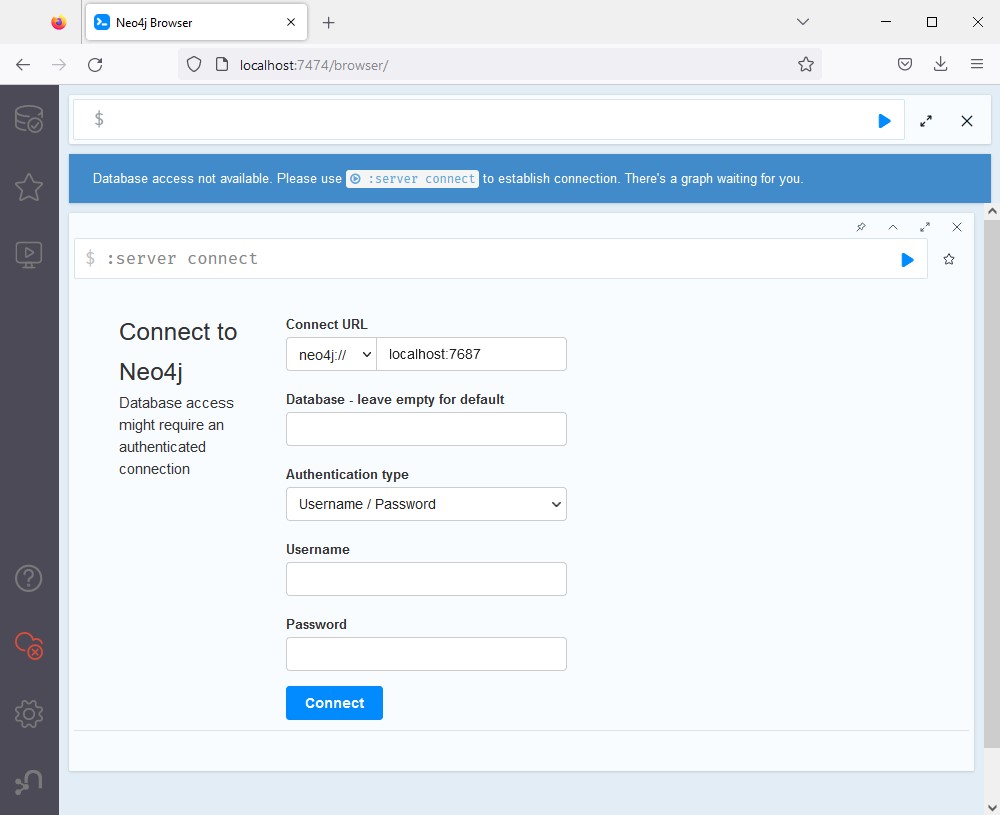
Once the service is started, open your web browser and navigate to http://localhost:7474. Use the default credentials: Username: neo4j and Password: neo4j.
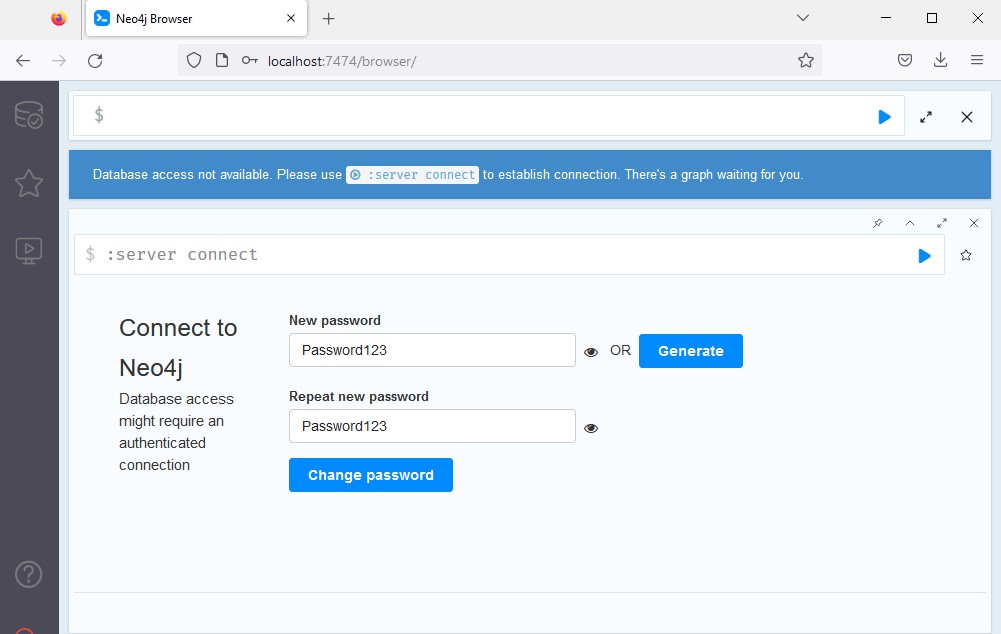
Change Default Password
You will be prompted to change the default password immediately. Set a strong password, such as Password123 for lab environments, and click Change.
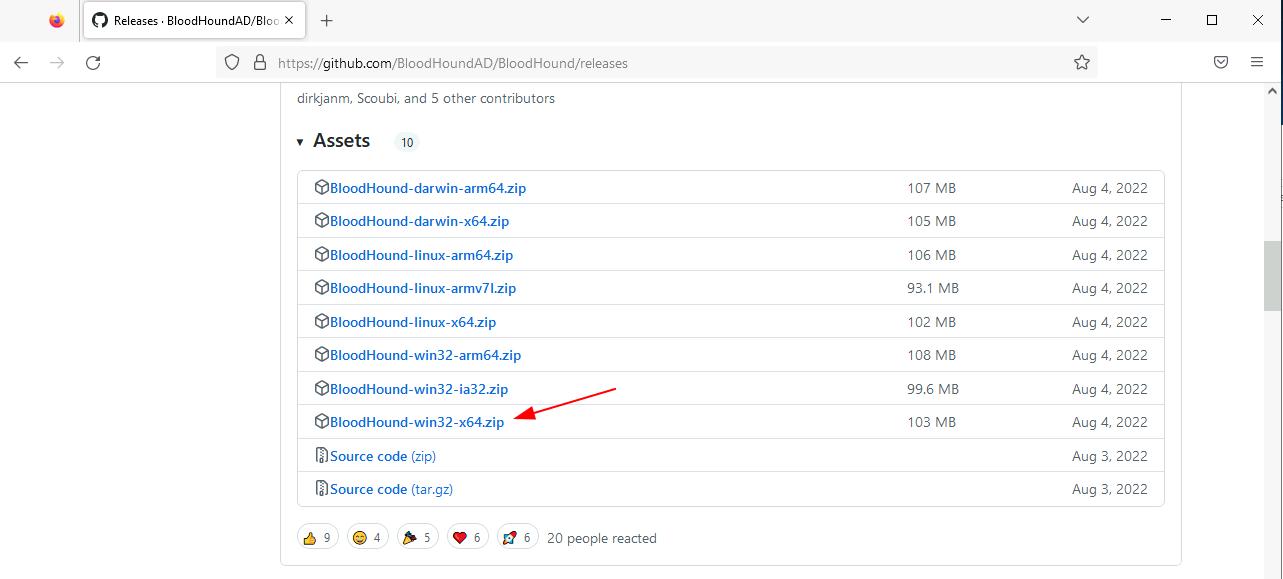
Download the BloodHound GUI Client
Navigate to the official BloodHound GitHub **releases** page to download the latest executable client for Windows.
BloodHound GUI Client Releases: GitHub Releases Page
Launch the BloodHound Client
Run the downloaded client executable (e.g., `BloodHound.exe`). It will attempt to connect to your running Neo4j service automatically.
Troubleshooting: Service Failures or Removal
If the service fails to start or you need to reinstall, use the following command to remove the service first:
The primary issue is often an incompatible Java version or a conflict. Ensure JRE 17+ is installed.
2. Theory & Concepts (Overview)
BloodHound is a single-page JavaScript web application backed by a Neo4j graph database. It is the industry standard for identifying and visualizing complex **attack paths** within an Active Directory environment. Instead of manual enumeration, BloodHound applies **graph theory** to quickly find the shortest route from a low-privilege entry point to highly sensitive targets like Domain Admin (DA).
Graph Theory, Nodes, and Edges
BloodHound utilizes **Graph Theory**, mathematical structures used to model pairwise relations between objects. A graph in this context is made up of **nodes** (Active Directory objects such as users, groups, computers, etc.) which are connected by **edges** (relations between objects such as membership of a group, AdminTo, etc.).
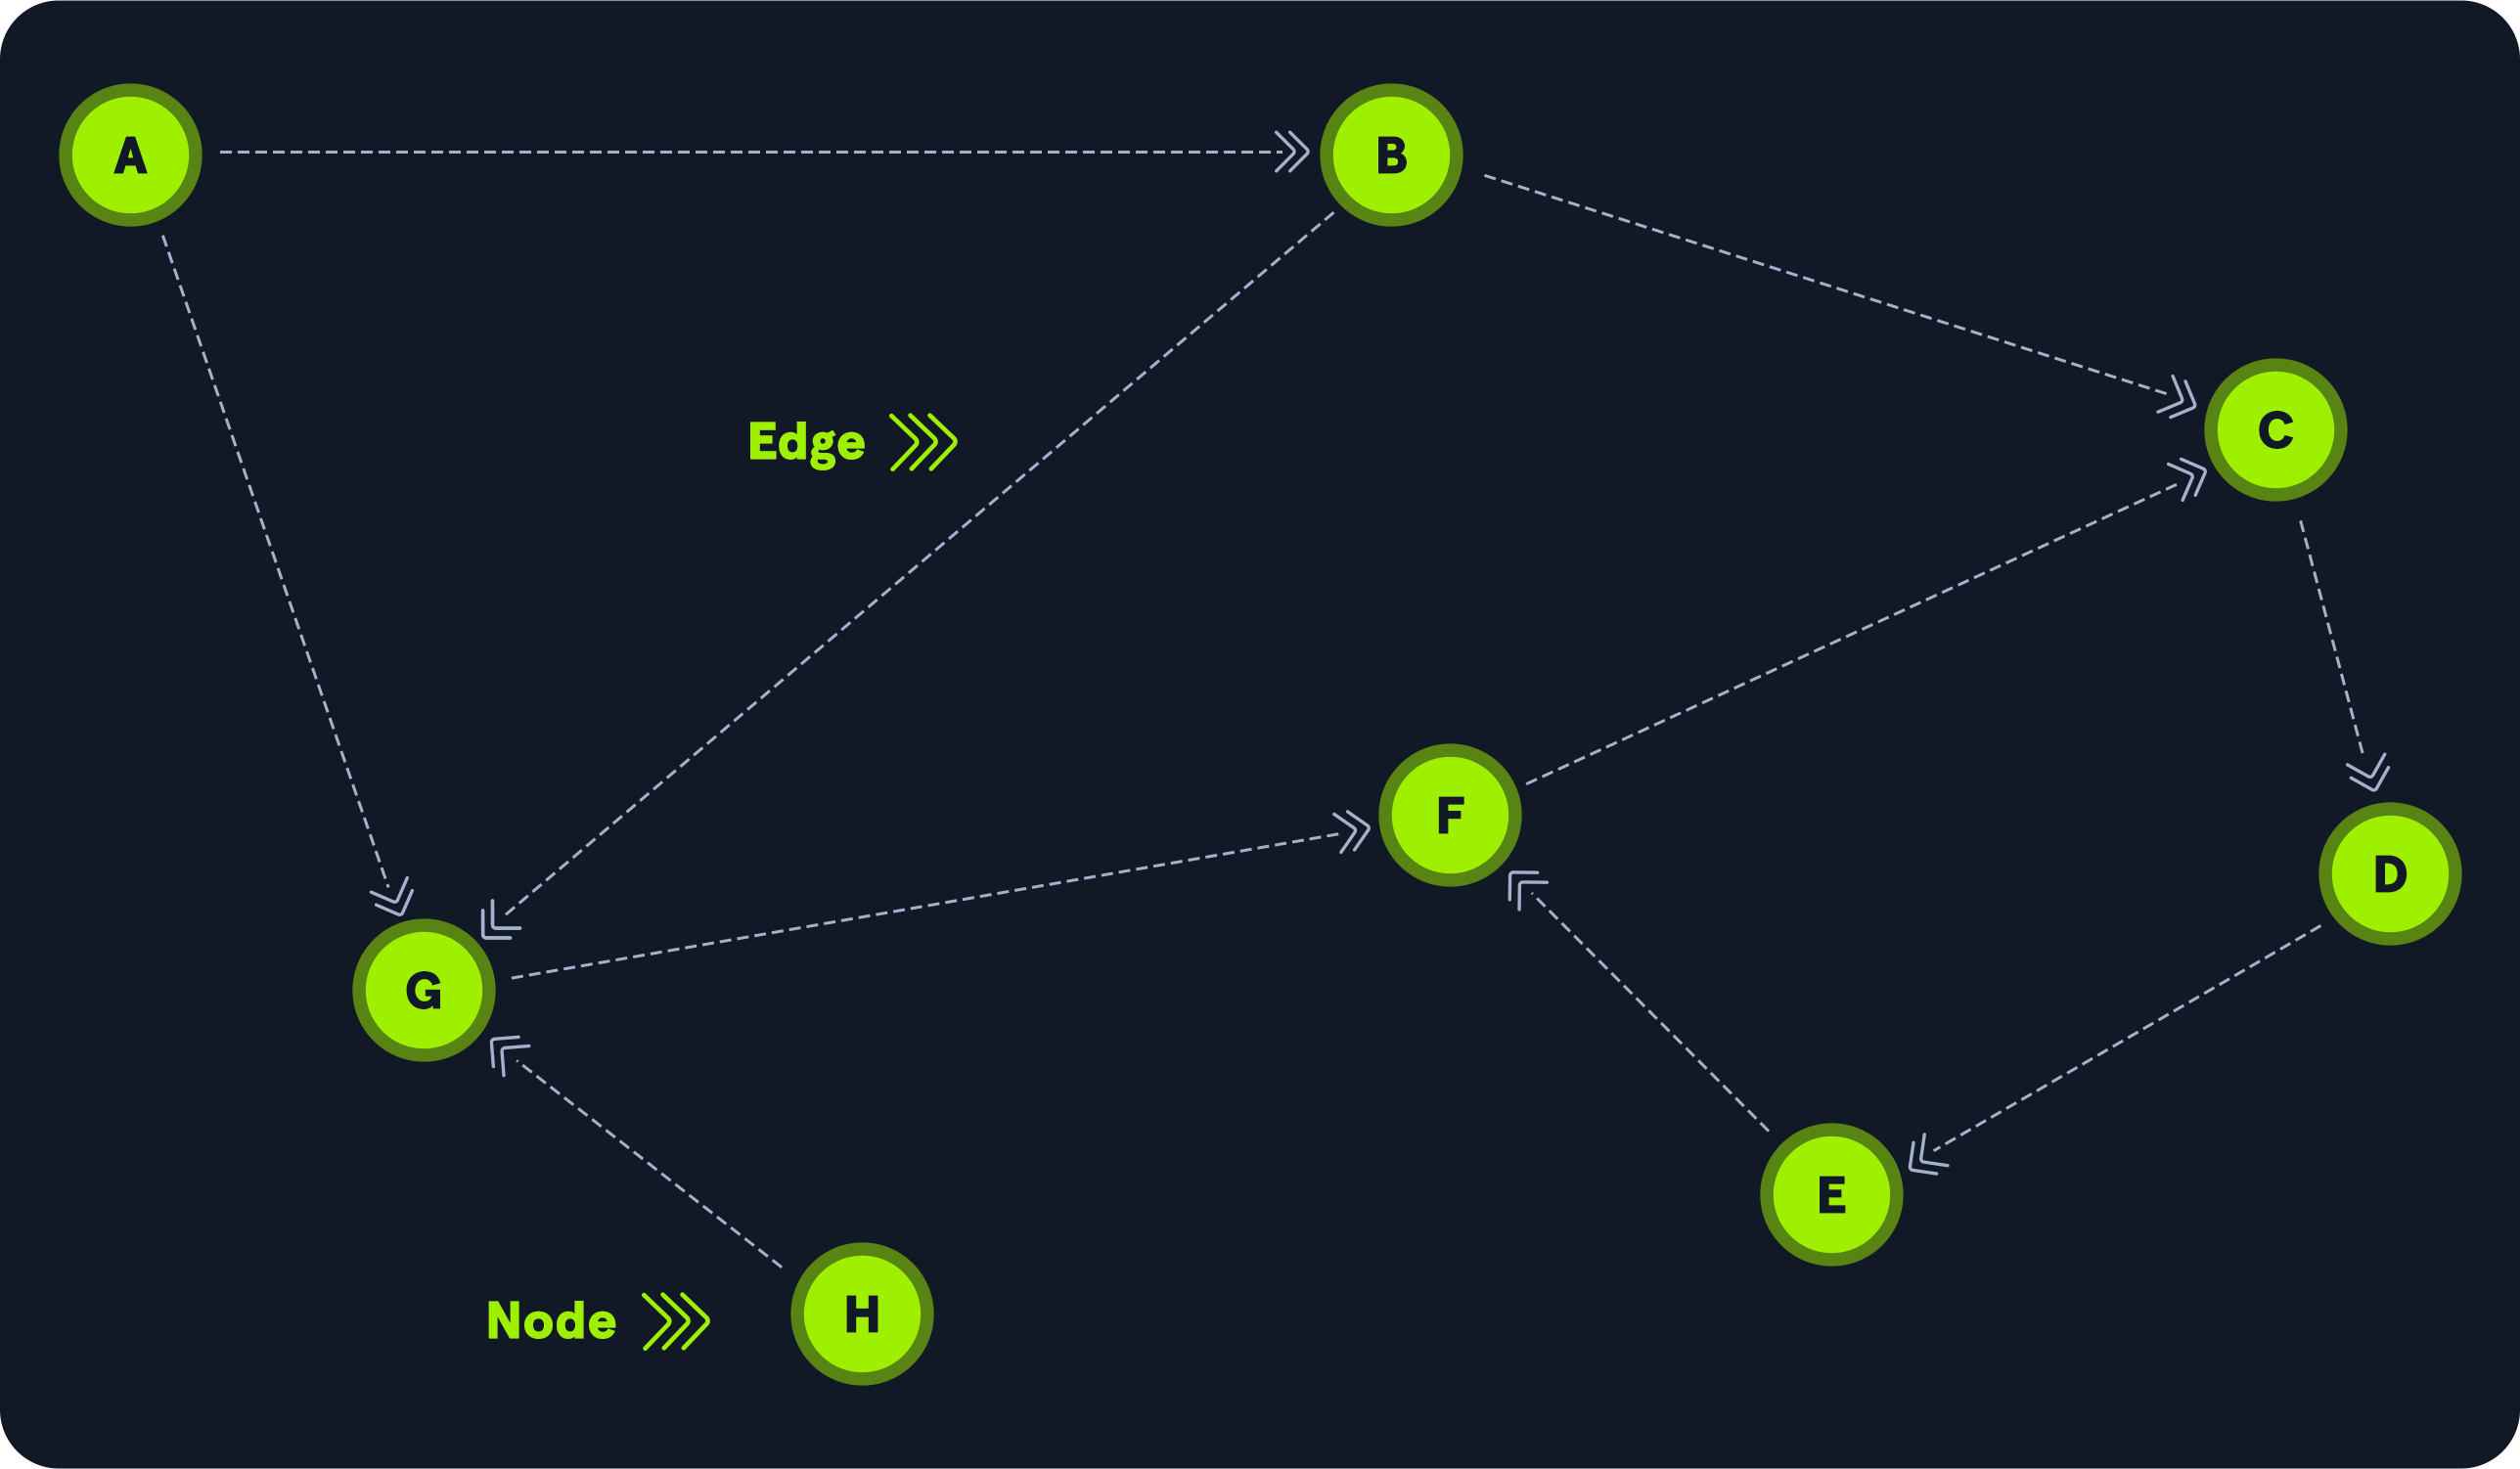
Example of a Directed Edge (Simple):
The below diagram shows two nodes, A and B. In this example, we can only go from node A to node B, not the other way. This mimics a trust relationship (like AdminTo) which is often one-way.

This could simulate A as the user Grace and B as the group SQL Admins. The line between the two is the edge, which in this case is MemberOf. The next graphic shows us that relationship in BloodHound, where the user Grace is a member of the SQL Admins group.

Example of Shortest Path (Complex):
Let’s see a more complex relationship between nodes. The following graphic shows eight (8) nodes and ten (10) edges. Node H can reach node G, but no node has a direct path to node H. To get to node C from node A, we can hop to node G, move to node F, and then to node C, but that’s not the shortest path. One of the BloodHound capabilities is to look for the **shortest path**. In this example, the shortest path from node A to node C is one hop through node B.
BloodHound's Pathfinding Advantage:
In the previous example, we used BloodHound to find that Grace is a member of SQL Admins, which is pretty simple to discover using tools like Active Directory Users and Computers GUI or the net user grace /domain command. With only that information, we might incorrectly conclude that Grace doesn’t have any path to the Domain Admins group. However, this is where BloodHound is much more helpful in identifying those complex, often non-obvious relationships between nodes that are not easy to locate manually.
Let’s use BloodHound as our map navigator and ask it to find the shortest path from the user Grace to the Domain Admins group. Here’s the result:
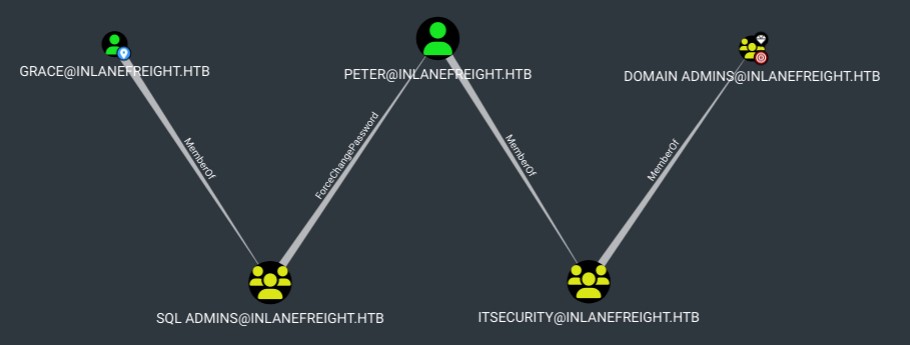
This means that Grace, as a member of the SQL Admins group, can change Peter’s password. Authenticate with Peter’s new password and perform operations as a member of the Domain Admins group. Although Peter is not a member directly, he is a member of a group that is.
Cypher Query Language
The tool uses **Cypher Query Language** to analyze these relationships. Cypher is Neo4j’s graph query language that lets us retrieve data from the graph. It is like SQL for graphs, and was inspired by SQL, so it lets us focus on *what* data we want out of the graph (not how to go get it). It is the easiest graph language to learn by far because of its similarity to other languages and intuitiveness. We will discuss more about Cypher queries later in this module.
The Power of Graph Theory:
BloodHound models AD objects (Users, Groups, Computers) as Nodes and relationships (MemberOf, CanLogOnTo, WriteDACL) as Edges. This representation allows for rapid querying and pathfinding that is impossible with standard AD tools.
3. SharpHound - Data Collection from Windows
SharpHound is the official data collector tool for BloodHound. It is written in C# and can be run on Windows systems with the .NET framework installed. The tool uses various techniques to gather data from Active Directory, including native Windows API functions and LDAP queries. The data collected by SharpHound can be used to identify security weaknesses in an Active Directory environment to attack it or to plan for remediation.
Running SharpHound.exe
When you download and extract the BloodHound client (Step 5 of Installation), the collector is typically found here: \BloodHound-win32-x64\resources\app\Collectors.
The most comprehensive collection method is -c All (or --collectionmethod All), which attempts to collect all possible data points.
2025-01-01 10:00:00 - Starting SharpHound v1.1.1
2025-01-01 10:00:00 - Resolved Collection Methods: Group, LocalAdmin, Session, Trusts, ACL, Container, RDP, ObjectProps, DCOM, SPNTargets, PSRemote.
2025-01-01 10:00:00 - Running against Domain: TARGET.LOCAL
...
2025-01-01 10:00:15 - Finished collection in 00:00:15. Collected 500 objects.
2025-01-01 10:00:15 - Compressing data to 20250101100015_BloodHound.zip
2025-01-01 10:00:16 - Collection complete!
Understanding Collection Methods
The 2nd line in the output above indicates the collection methods used by default with -c All: Resolved Collection Methods: Group, LocalAdmin, Session, Trusts, ACL, Container, RDP, ObjectProps, DCOM, SPNTargets, PSRemote.
These methods mean that we will collect the following information:
- Users and Computers.
- Active Directory security group membership.
- Domain trusts.
- Abusable permissions on AD objects (ACL).
- OU tree structure (Container).
- Group Policy links.
- The most relevant AD object properties (ObjectProps).
- Local groups from domain-joined Windows systems and local privileges such as RDP, DCOM, and PSRemote.
- User sessions (Session).
- All SPN (Service Principal Names) linked to user accounts (SPNTargets).
Privilege Requirements for Full Collection
To get the information for **local groups** and **sessions**, SharpHound will attempt to connect to each domain-joined Windows computer from the list it collected. If the user from which SharpHound is running has privileges on the remote computer, it will collect the following information:
- The members of the local administrators, remote desktop, distributed COM, and remote management groups.
- Active sessions to correlate to systems where users are interactively logged on.
Note:
Gathering information from domain-joined machines, such as local group membership and active sessions, is only possible if the user session from which SharpHound is being executed has **Administrator rights** on the target computer.
Output Summary:
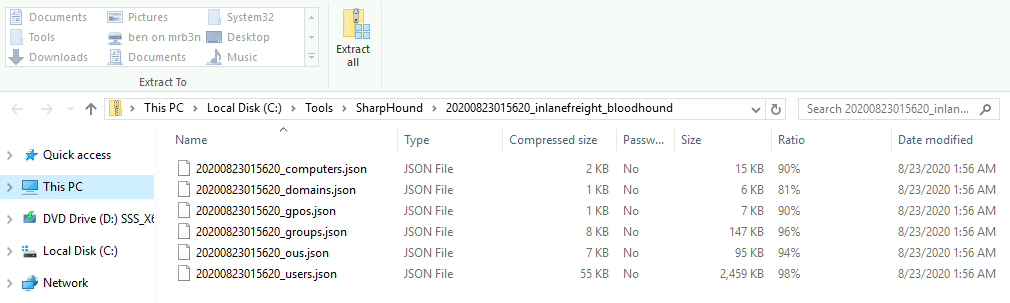
Once SharpHound terminates, by default, it will produce a **zip file** whose name starts with the current date and ends with BloodHound (e.g., 20250101100016_BloodHound.zip). This zip archive contains a group of **JSON files** ready for import.
Advanced Collection Methods and Options
The option -collectionmethod or -c allows us to specify exactly what kind of data we want to collect. Below are descriptions of the primary method shortcuts:
- All: Performs all collection methods except
GPOLocalGroup. - DCOnly: Collects data only from the domain controller and will not try to get data from domain-joined Windows devices. It will collect users, computers, security group memberships, domain trusts, abusable permissions on AD objects, OU structure, Group Policy, and the most relevant AD object properties. It will attempt to correlate Group Policy-enforced local groups to affected computers.
- ComputerOnly: This is the opposite of DCOnly. It will only collect information from domain-joined computers, such as user sessions and local groups.
Commonly Used Operational Flags
These flags allow for authenticated collection with alternate credentials and targeted scanning:
- If we get credentials from a user other than the context from which we are running, we can use the
--ldapusernameand--ldappasswordoptions to run SharpHound using those credentials. - Another flag we find helpful is
-dor--domain. Although this option is often assigned by default, if we are in an environment where multiple domains exist, we can use this option to ensure that SharpHound will collect the information from the domain we specify. - SharpHound will capture the domain controller automatically, but if we want to target a specific DC, we can use the option
--domaincontrollerfollowed by the IP or FQDN of the target domain controller. This option could help us target a forgotten or secondary domain, which may have less security or monitoring tools than the primary domain controller. Another use case for this flag is if we are doing port forwarding, we can specify an IP and port to target. We can use the flag--ldapportto select a port.
Randomize and Hide SharpHound Output (OpSec)
Defense teams could use predictable output patterns (filenames, location) to detect BloodHound activity. Use these options to maintain a low profile:
| Option | Description |
|---|---|
| --memcache | Keep cache in memory and don’t write temporary files to disk. |
| --randomfilenames | Generate random filenames for output, including the zip file. |
| --outputprefix | String to prepend to output file names. |
| --outputdirectory | Directory to output file to. |
| --zipfilename | Filename for the zip. |
| --zippassword | Password protects the zip with the specified password. |
Advanced Data Exfiltration (Remote SMB Upload)
In live engagements, you often want the SharpHound output immediately transferred back to your attacker machine. This can be achieved by setting up a malicious **SMB share** on the attacker's machine (e.g., using Impacket) and configuring SharpHound to output directly to that remote share.
Step 1: Start the Shared Folder on the Attacker Machine (Linux/Kali)
Start the Impacket smbserver.py, creating a share named 'share' with temporary credentials. Assume the attacker's IP is 10.10.14.33.
Impacket v0.10.1.dev1+20220720.103933.3c6713e3 - Copyright 2022 SecureAuth Corporation

[*] Config file parsed
[*] Callback added for UUID 4B324FC8-1670-01D3-1278-5A47BF6EE188 V:3.0
[*] Callback added for UUID 6BFFD098-A112-3610-9833-46C3F87E345A V:1.0
[*] Config file parsed
[*] Config file parsed
[*] Config file parsed
Step 2: Connect to the Shared Folder from the Compromised Host (Windows)
Use net use on the target Windows machine to map the share using the defined credentials. This confirms connectivity.
The command completed successfully.
Step 3: Run SharpHound to Output Directly to the Share
Combine the --outputdirectory flag with the remote UNC path and OpSec flags for a clean collection and exfiltration in one step.
2023-01-11T11:31:43.4459137-06:00|INFORMATION|This version of SharpHound is compatible with the 4.2 Release of BloodHound
2023-01-11T11:31:43.5998704-06:00|INFORMATION|Resolved Collection Methods: Group, LocalAdmin, Session, Trusts, ACL, Container, RDP, ObjectProps, DCOM, SPNTargets, PSRemote
2023-01-11T11:31:43.6311043-06:00|INFORMATION|Initializing SharpHound at 11:31 AM on 1/11/2023
...
2023-01-11T11:31:55.2710788-06:00|INFORMATION|Beginning LDAP search for INLANEFREIGHT.HTB
... (Output continues, resulting in a zip file saved on the attacker's machine)
Step 4: Retrieve and Unzip the File on the Attacker Machine
Once the execution completes on the target, you can immediately unzip the file on your local machine using the password defined with --zippassword.
Archive:  ./HTB_20230111113143_5yssigbd.w3f
[./HTB_20230111113143_5yssigbd.w3f] HTB_20230111113143_hjclkslu.2in password:
  inflating: HTB_20230111113143_hjclkslu.2in
  inflating: HTB_20230111113143_hk3lxtz3.1ku
  inflating: HTB_20230111113143_kghttiwp.jbq
  inflating: HTB_20230111113143_kdg5svst.4sc
  inflating: HTB_20230111113143_qeugxqep.lya
  inflating: HTB_20230111113143_xsxzlxht.awa
  inflating: HTB_20230111113143_51zkhw0e.bth
Now we can upload our data to BloodHound (see Section 4: Analysis).
4. Analysis: Importing and Querying Data
Once the Neo4j service is running and you have your data, you can launch the BloodHound GUI (client) to start your analysis.
Importing Data into BloodHound
Need sample data?
Download the example dataset to follow along with this guide.
-
Start the Neo4j Database Service
If the service isn't already running, start it from an elevated terminal:
net start neo4jThe Neo4j Graph Database - neo4j service is starting.. The Neo4j Graph Database - neo4j service was started successfully.
-
Launch and Log In to the BloodHound Client
Launch the client and log in using the credentials you set during Phase B of the installation (e.g.,
C:\Tools\BloodHound\BloodHound.exe).Username: neo4j and Password: Password123
-
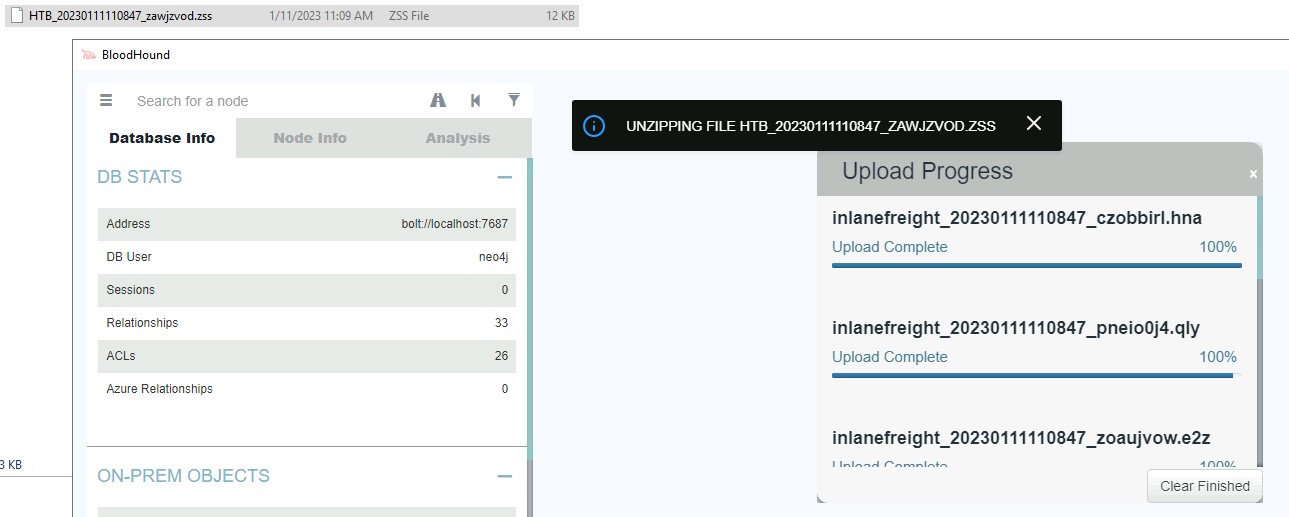
Upload the SharpHound Zip File
Click the **Upload Data** icon (the small upload button on the far right of the BloodHound interface), browse to your SharpHound zip file (e.g.,
20250101100016_BloodHound.zip), and upload it. You will see a status bar showing the upload progress.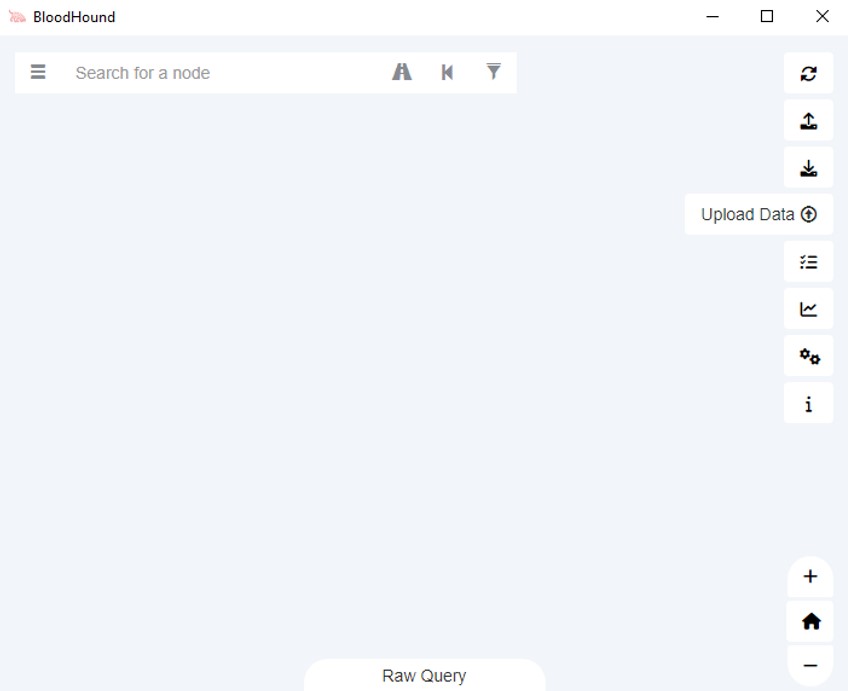
Note on Duplicates:
We can upload as many zip files as we want. BloodHound will not duplicate the data but will add any new data not already present in the database (e.g., from a more recent collection). If computer names do not appear correctly after the first import, re-importing the file often corrects this issue.
Initial Data Exploration
The Graph Drawing Area (Interactive Visualization)
This area is known as the **Graph Drawing Area**, where BloodHound displays nodes and their relationship using edges. We can interact with the graph, move objects, zoom in or zoom out (with the mouse scroll or the bottom right buttons), click on nodes to see more information, or right-click them to perform different actions.
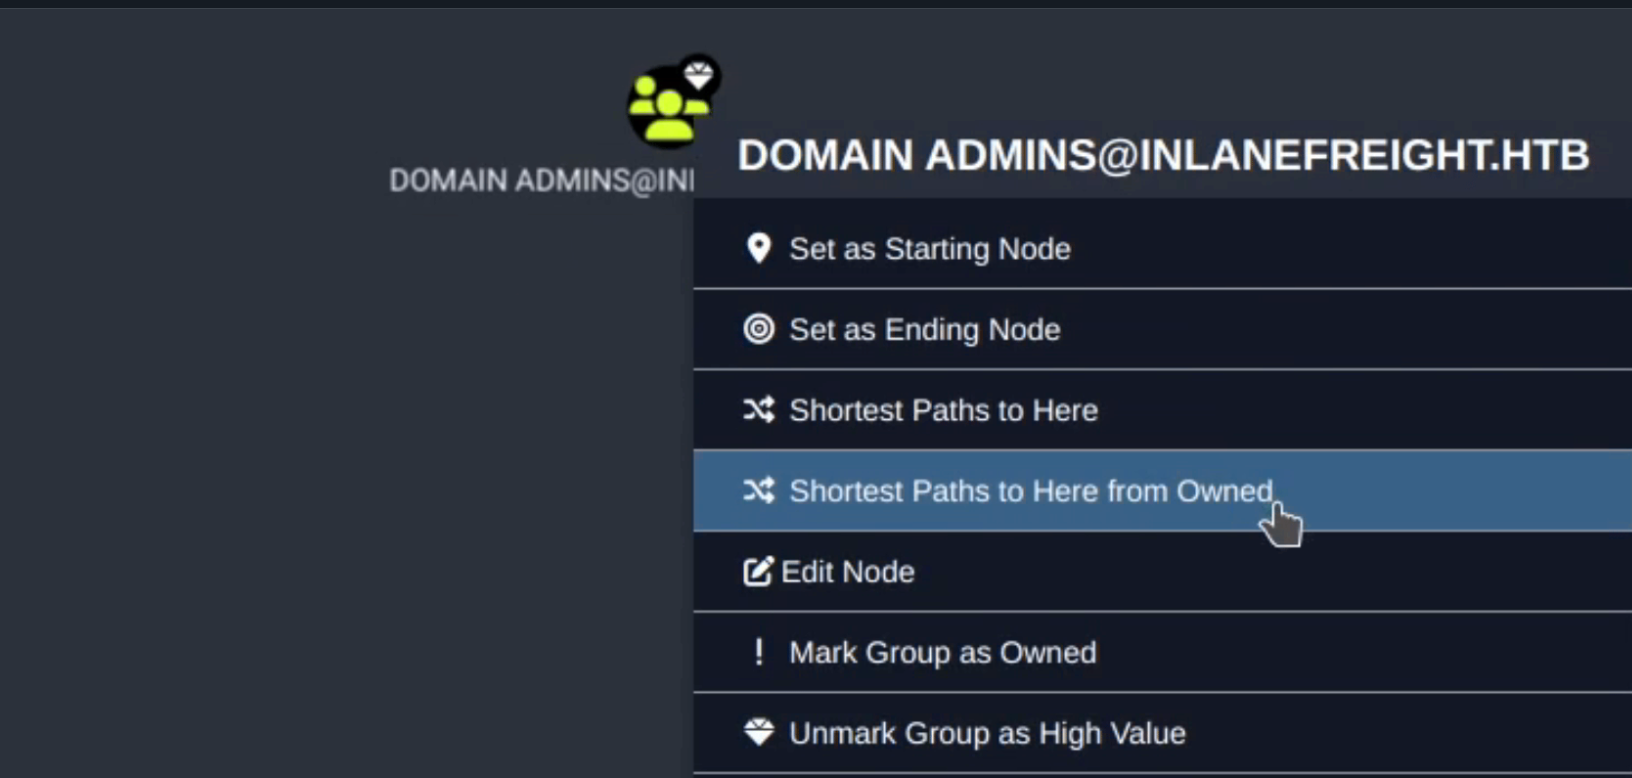
Right-Click Context Menu Options (Nodes):
| Command | Description |
|---|---|
| Set as Starting Node | Set this node as the starting point in the pathfinding tool. Click this, and you will see this node’s name in the search bar. Then, you can select another node to target after clicking the pathfinding button. |
| Set as Ending Node | Set this node as the target node in the pathfinding tool. |
| Shortest Paths to Here | This will perform a query to find all shortest paths from any arbitrary node in the database to this node. This may cause a long query time in Neo4j and an even longer render time in the BloodHound GUI. |
| Shortest Paths to Here from Owned | Find attack paths to this node from any node you have marked as owned. |
| Edit Node | This brings up the node editing modal, where you can edit current properties on the node or even add our custom properties to the node. |
| Mark Group as Owned | This will internally set the node as owned in the Neo4j database, which you can then use in conjunction with other queries such as “Shortest paths to here from Owned”. |
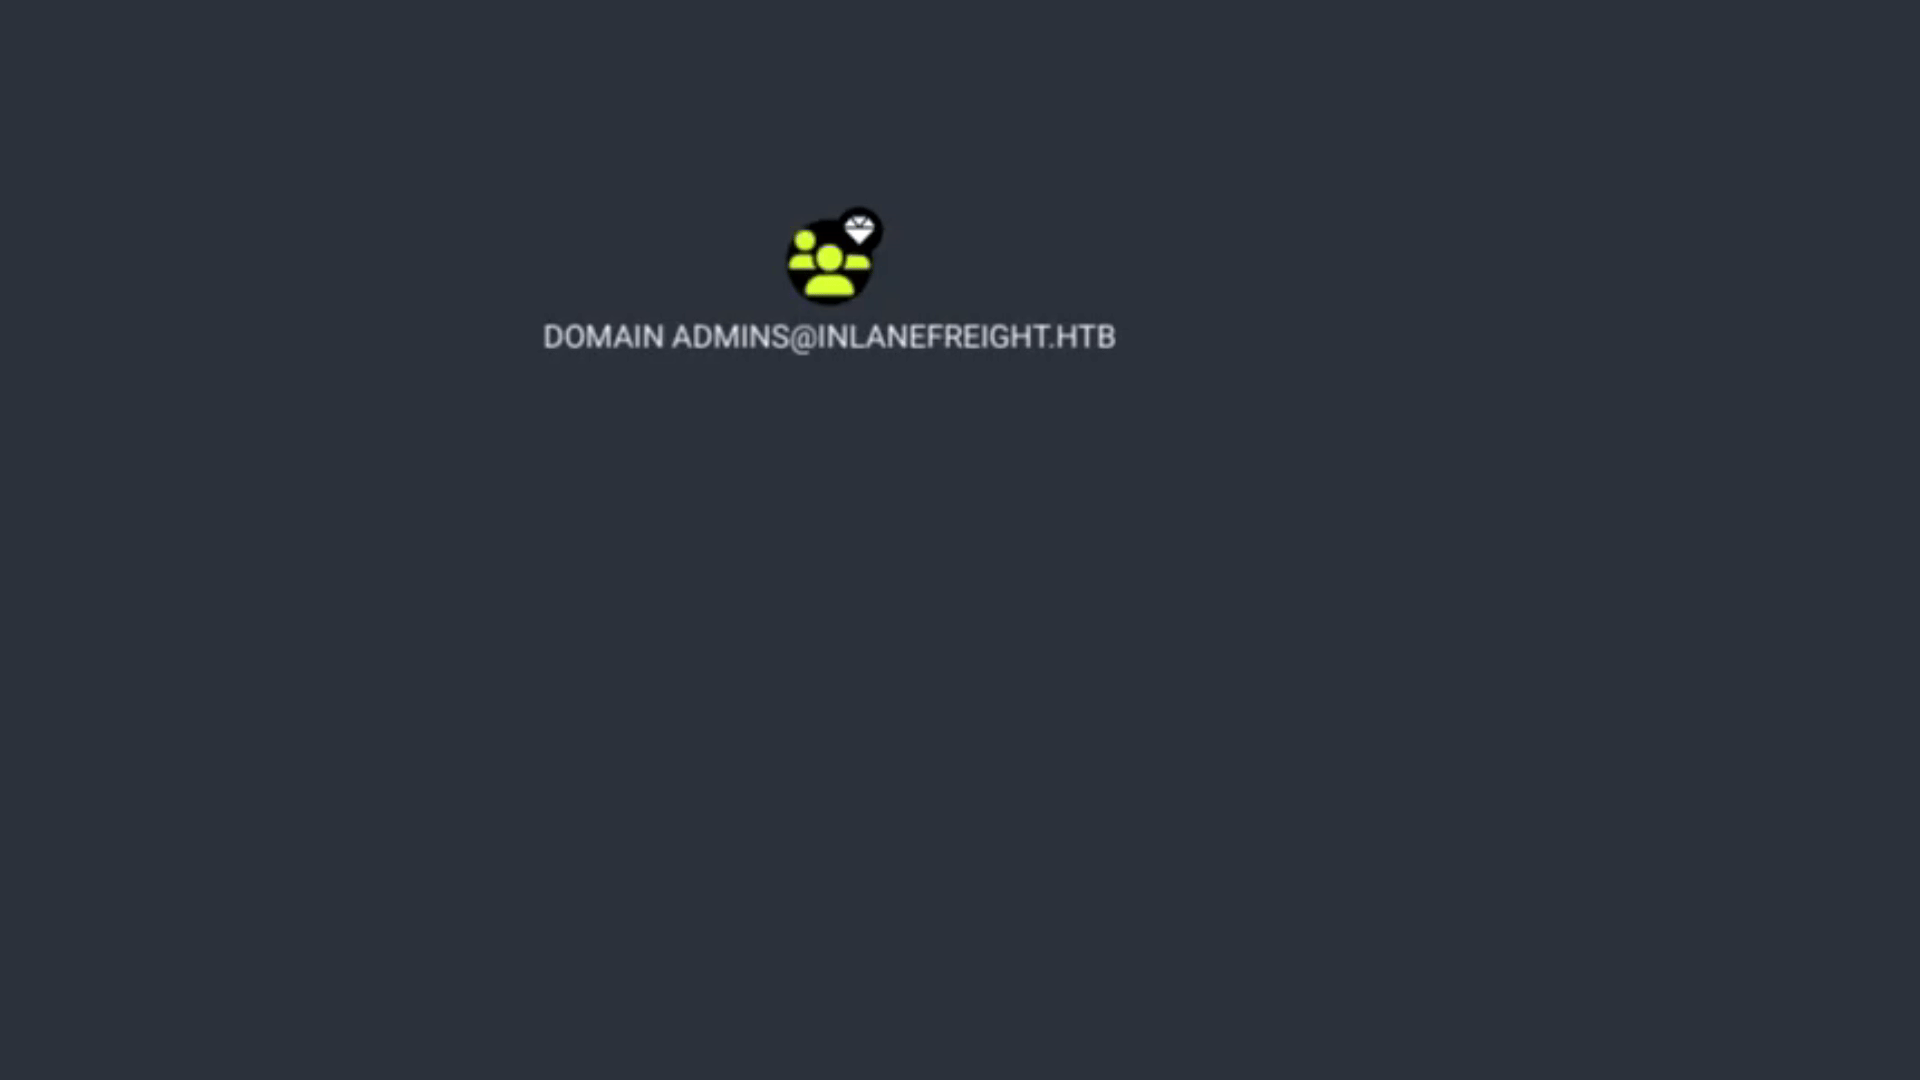
| Mark/Unmark Group as High Value | Some nodes are marked as “high value” by default, such as the domain admins group and enterprise admin group. We can use this with other queries, suchs as “shortest paths to high-value assets”. |
| Delete Node | Deletes the node from the Neo4j database. |
Keyboard Shortcuts:
| Shortcut | Description |
|---|---|
| CTRL | Pressing CTRL will cycle through the three different node label display settings: default, always show, and always hide. |
| Spacebar | Pressing the Spacebar will bring up the spotlight window, which lists all currently drawn nodes. Click an item in the list, and the GUI will zoom into and briefly highlight that node. |
| Backspace | Pressing Backspace will return to the previous graph result rendering. This is the same functionality as clicking the Back button in the search bar. |
| S | Pressing the letter S will toggle the expansion or collapse of the information panel below the search bar. This is the same functionality as clicking the More Info button in the search bar. |
Interacting with Edges: The Help Menu
The **Graph Drawing Area** also lets us interact with **Edges**. They represent the link between two nodes and help us understand how we will move from one object to another. As BloodHound has many edges, it is challenging to keep track of how we can abuse every single one. The BloodHound team included a **help menu** under edges, where we can see information, examples, and references on how to abuse every single edge.
Search Bar Mastery
The **Search Bar** is one of the elements of BloodHound that we will use the most. We can search for specific objects by their name or by using type prefixes to narrow the results. If we click on a node we searched, its information will be displayed immediately in the Node Info tab.
Node Type Prefixes:
If we want to search for a specific type, we can prepend our search with the node type, for example, user:peter or group:domain. Let’s see this in action:
Pathfinding
Another great feature in the search bar is **Pathfinding**. We can use it to find an attack path between two given nodes. This is the core capability that highlights non-obvious relationships.
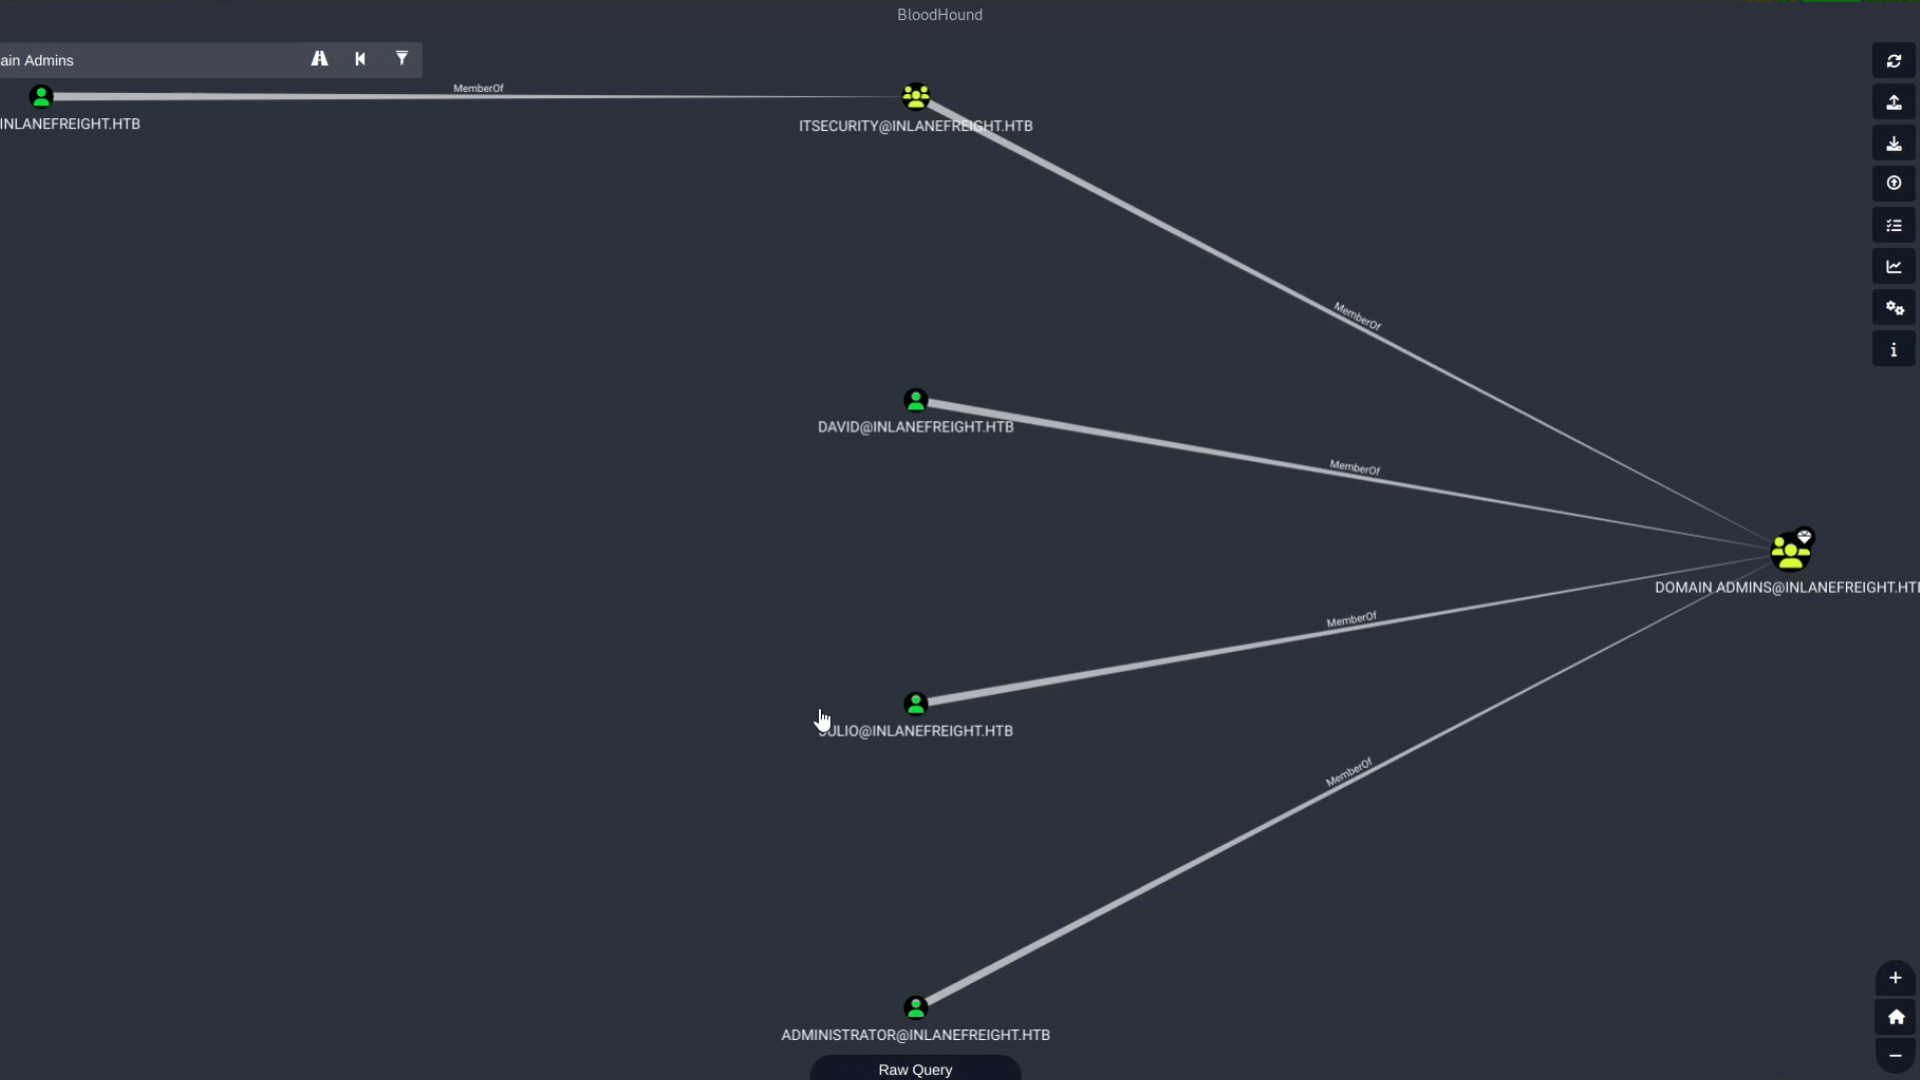
For example, we can look for an attack path from the user **ryan** to **Domain Admins**. The initial path result is:
Ryan > Mark > HelpDesk > ITSecurity > Domain Admins
This path contains the edge **ForceChangePassword**. Let’s say we want to avoid changing users’ passwords. We can use the filter option, uncheck **ForceChangePassword**, and search for the path without this edge. The new, longer, but safer path result is:
Ryan > AddSelf > Tech_Support > Testinggroup > HelpDesk > ITSecurity > Domain Admins
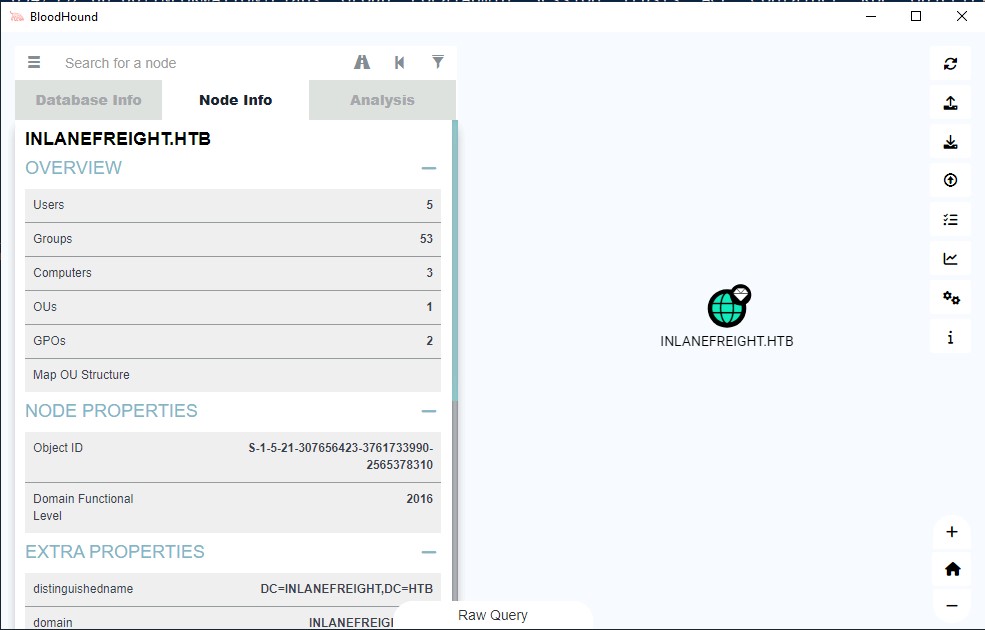
Once the upload is complete, we can begin analyzing the data. To view general information about the domain, type the domain name into the search box (e.g., **Domain:INLANEFREIGHT.HTB**). Clicking the resulting icon will display statistics about the node, including the count of users, groups, computers, and OUs.
The **Node Info** panel on the right side of the screen displays comprehensive details about the selected object (node), including its properties, membership relationships, and abusable access control lists (ACLs).
Now, we can start analyzing the information in BloodHound and find the shortest attack paths to our high-value targets.
Running Core Queries
BloodHound provides a set of powerful pre-built queries to quickly find common attack paths and points of interest.
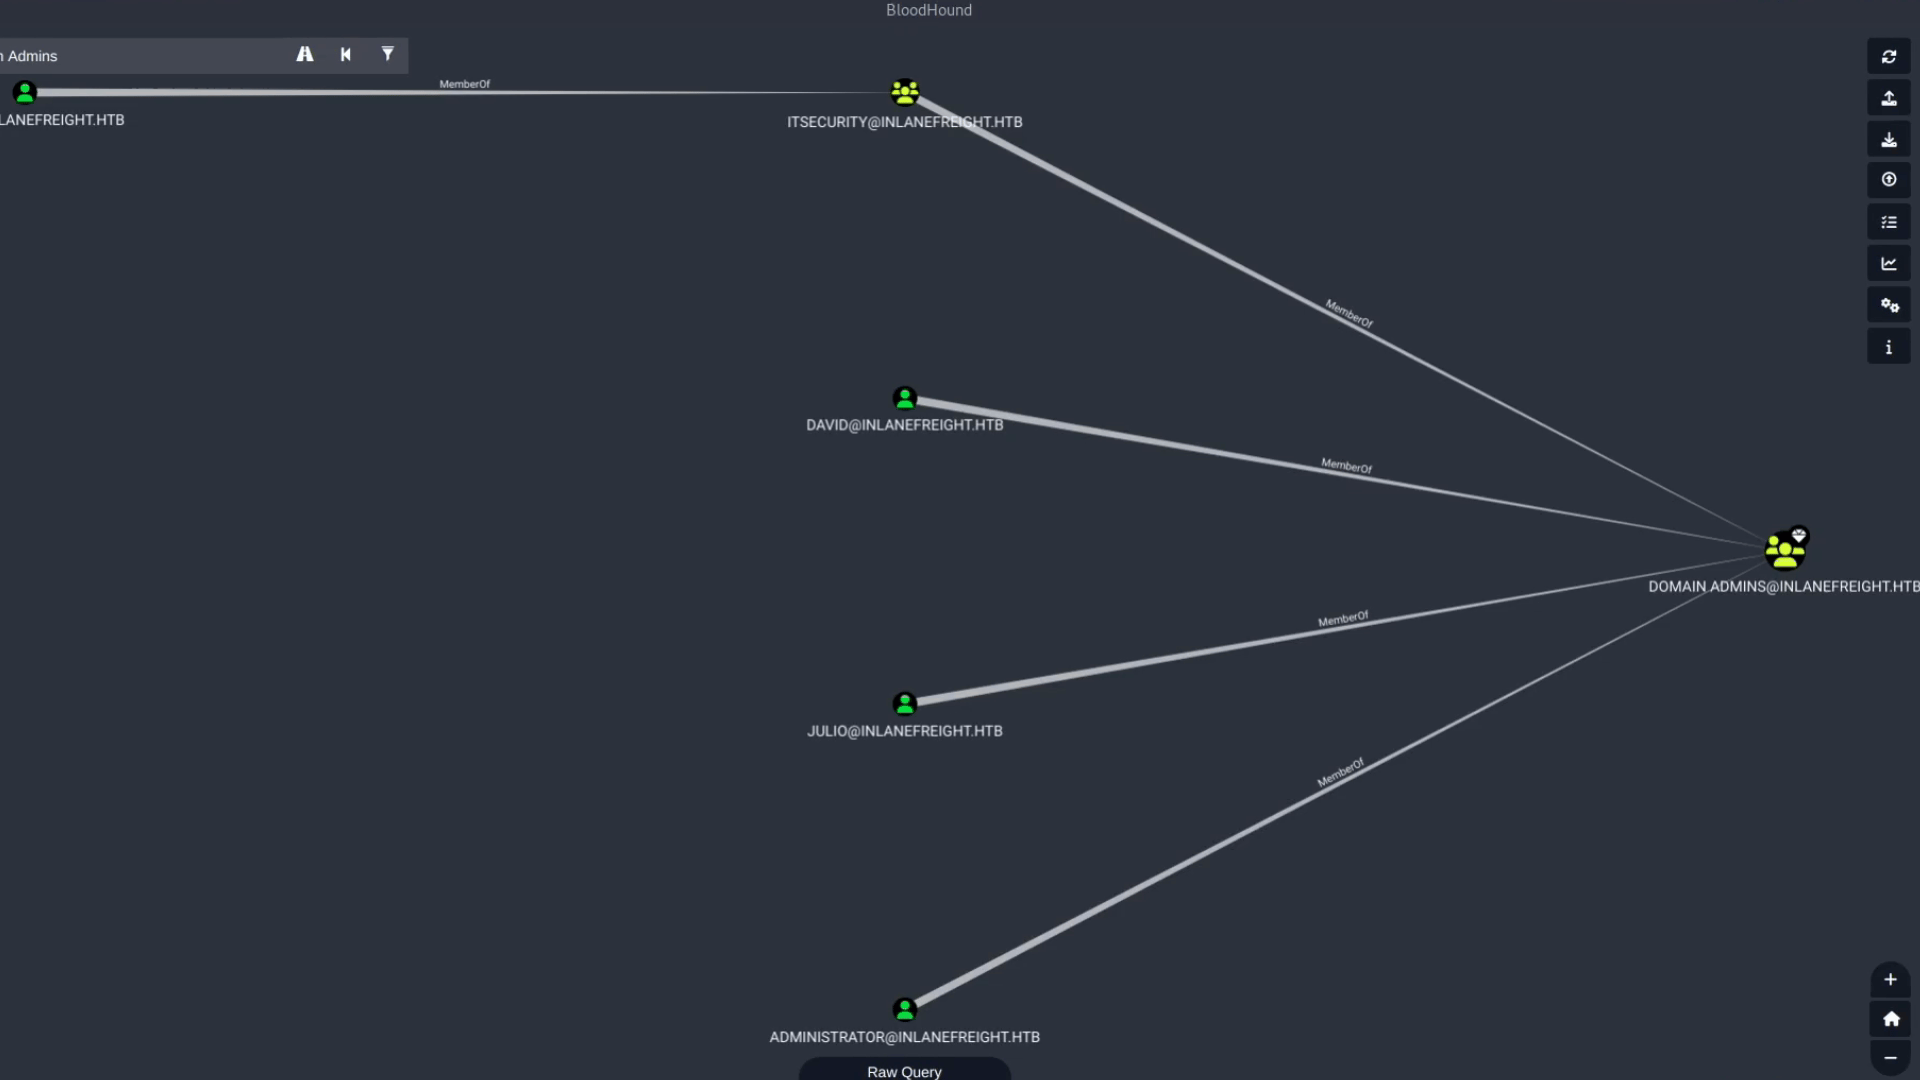
Shortest Path to Domain Admins
Identifies the fastest path from any controllable entity to DA.
Users with Sessions on Domain Admins
Finds low-privilege users who are currently logged into DA-controlled systems, making them prime targets for credential theft.
Kerberoastable Users
Lists users with Service Principal Names (SPNs) that allow their password hashes to be easily extracted offline.
High Value Targets
Pre-defined query for finding high-value users, computers, and groups with weak access controls.
Cypher Query Language:
BloodHound uses Cypher (the Neo4j query language) for custom searches. For example, to find all users with Administrator privileges on a specific computer:
Database Info and Management
The **BloodHound Database Info** tab gives users a quick overview of their current Neo4j database status. Here, users can view the database’s number of sessions, relationships, ACLs, Azure objects and relationships, and Active Directory Objects.
Additionally, there are several options available for managing the database:
| Option | Description |
|---|---|
| Clear Database | Lets users completely clear the database of all nodes, relationships, and properties. This can be useful when starting a new assessment or dealing with outdated data. |
| Clear Sessions | Lets users clear all saved sessions from the database. |
| Refresh Database Stats | Updates the displayed statistics to reflect any changes made to the database. |
| Warming Up Database | Is a process that puts the entire database into memory, which can significantly speed up queries. However, this process can take some time to complete, especially if the database is large. |
Utility Buttons: Export, Import, and Upload
The top-right corner of the BloodHound interface contains several utility buttons for managing your graph data and the display:
Export Graph & Image
**Export Graph:** Saves the current graph view in **JSON format** so it can be imported later for sharing or backup. We can also save the current graph as a picture in **PNG format** for documentation.
**Import Graph:** We can display the JSON formatted graph we previously exported.
Upload Data
**Upload Data:** Uploads SharpHound, BloodHound.py, or AzureHound data to the Neo4j database. We can select the upload data with the dedicated upload button or **drag and drop** the JSON or zip file directly into the BloodHound window.